Overview
Odoo 17 & 18 Module – Centralized Outreach Planning, Activity Tracking, and Team Collaboration
The Campaign Module is a centralized tool to help organizations plan, execute, and monitor outreach and data collection efforts. It differs from Odoo’s default Marketing Campaign (email automation) by focusing on traceability, collaboration, and operational tracking.
Key Features:
- Track campaign activities across sales, marketing, and data teams.
- Maintain historical traceability of interactions and contact changes.
- Gain visibility into campaign performance and outcomes.
- Improve collaboration across departments.
Typical Use Cases:
- Event participation and follow-up
- Re-engagement with inactive clients
- Collecting local grant information from public institutions
- Prospecting new clients
- Reviewing and validating new contact data
Installation Guide
1️⃣ Download the Module
Download the Campaign module file (zip file)

2️⃣ Upload to Your Odoo Server
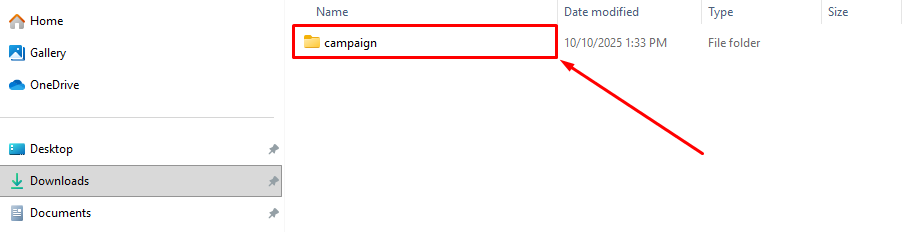
Ask your system administrator (or do it yourself if you manage the server) to upload and extract the Campaign folder into the Odoo addons folder.
3️⃣ Update the Apps List
- Log in to your Odoo account with admin access.
- Go to the Apps menu.
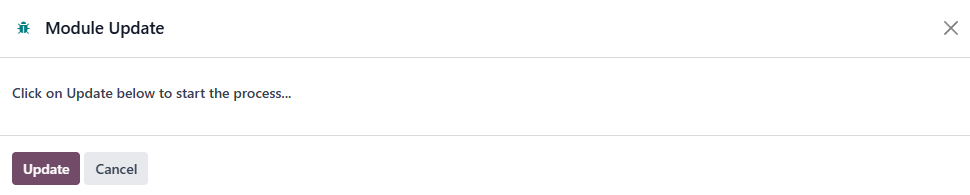
- Click Update Apps List (Developer Mode).
- Confirm.
4️⃣ Activate Campaign
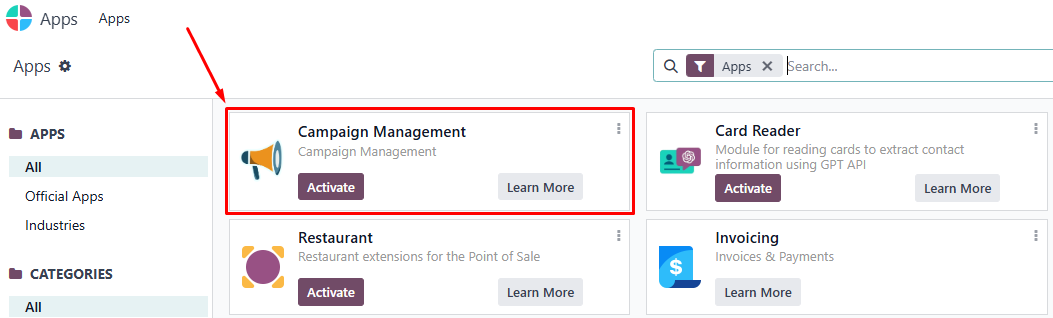
- In the Apps screen, type Campaign in the search bar.
- When the Campaign app appears, click Activate.
- Wait for the installation to complete.
With the Campaign Module, your teams gain full visibility, smoother collaboration, and reliable performance tracking—all in one place.
Accessing & Permissions
- Log in to Odoo 17 or 18.
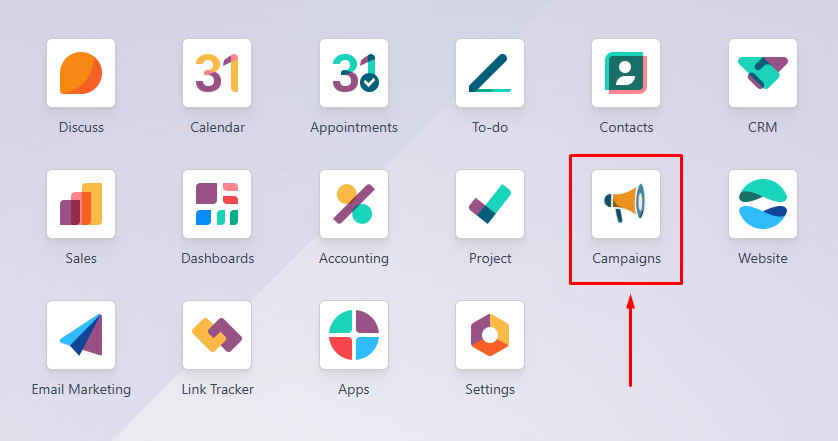
- Go to the Campaign module in the main menu.
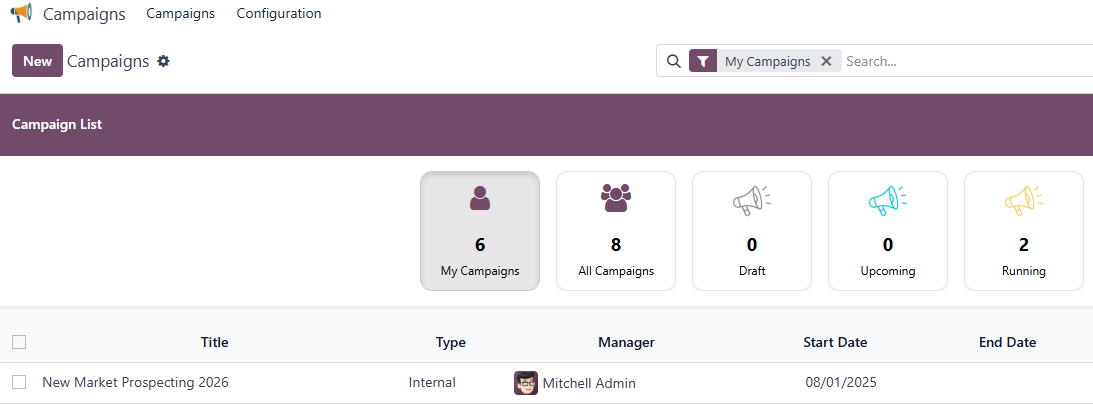
The module provides role-based access control. Users will only see campaigns relevant to their role.
A. Roles & Permissions
- Administrator – Full control, including campaign creation, editing, deletion, reassignment, and configuration.
- Director – Can create and manage assigned campaigns, assign members, and track results.
- Manager – Can create/manage campaigns they own; limited reassignment rights.
- User – Can only view or participate in campaigns they are assigned to.
💡 If you don’t see the menu, contact your administrator to ensure access rights.
Steps (Manual Process)
A. Creating a Campaign
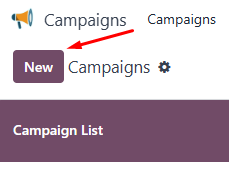
1. Basic Information
When creating a new campaign, you need to fill in the Basic Information section. The main fields include:
- Title → The campaign name (e.g., Client Re-engagement Q4 2025).
- Type → Defines the campaign category (e.g., Event, Sales Prospecting, Lobbying, Internal).
- Manager → The person responsible for the campaign’s execution and monitoring.
- Goals → The objectives to be achieved (e.g., Information Update, Obtain New Leads/Opportunities).
- Confidential → Checklist option. If checked, only Participants of the campaign and Administrators can see the campaign.
- Start Date / End Date → Timeline of the campaign. Determines status automatically.
- Remaining Days → Display only. Automatically shows the number of days left from today until the campaign’s end date.
- Progress → Display only. Automatically calculated based on either:
- Indicators tab, if an indicator has the field Use Progress checked, or
- Specific Fields tab, if a progress field is set with Use Progress checked.

💡 Once the campaign is saved and listed, you can configure it again by clicking the ⚙️ Settings Icon on the right side of the campaign row.

2. Description
The Description tab is a short summary to explain the purpose and context of the campaign.

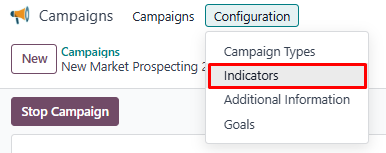
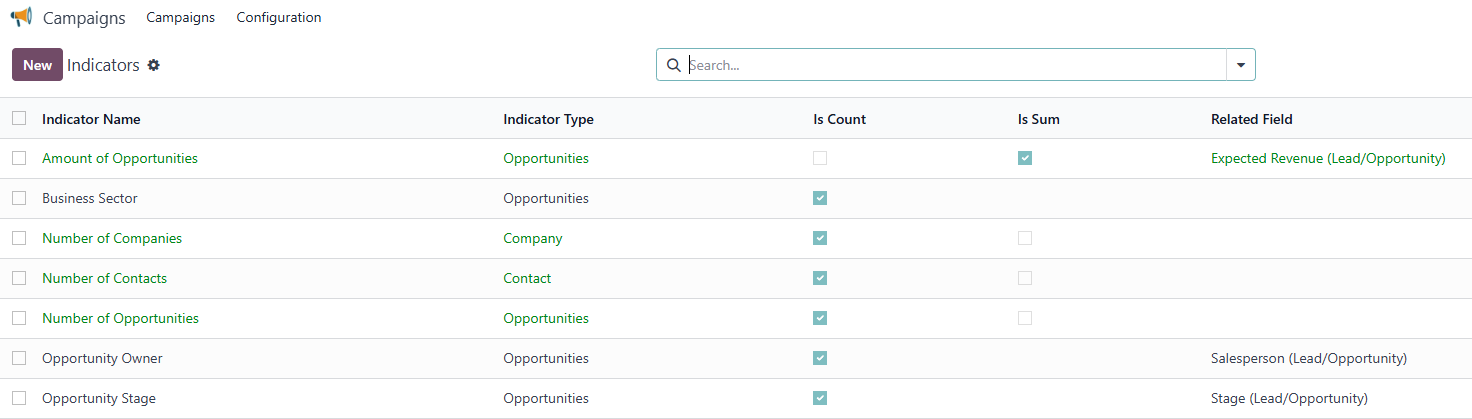
3. Indicators
The Indicators tab allows you to define and track measurable values for each campaign. Indicators are based on fields defined in the Configuration → Indicators menu.
Indicators are key fields that can be used in reports and dashboards. Administrators can:
- Assign which campaign types each indicator applies to
- Modify the name of the indicator
- Define whether the indicator is measurable or not (measurable indicators display a progress bar when a goal is set)
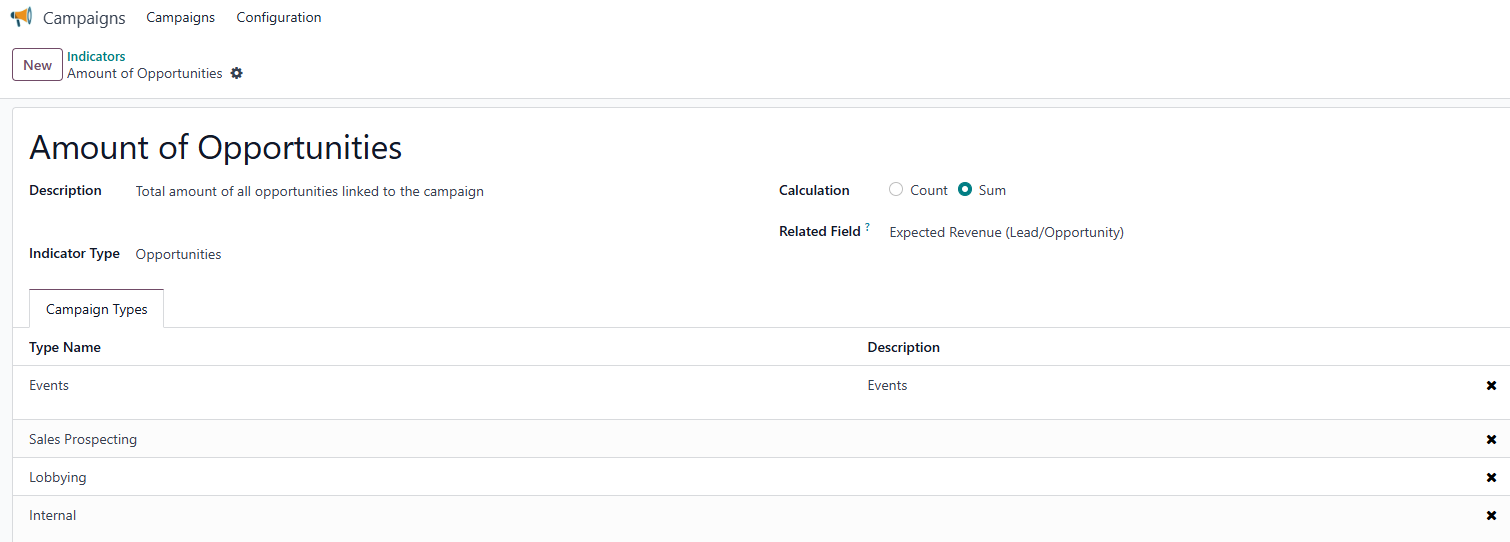
For each indicator, the following options are available:
- Name
The name of the indicator (e.g., Number of Contacts). This name will appear in campaign dashboards and selection lists. - Description
A short explanation of what the indicator measures (e.g., Count of contacts linked to the campaign). - Indicator Type
- Indicates the source model where the indicator data is pulled from.
- Example: Opportunity — data comes from the CRM opportunity records linked to the campaign.
- Calculation - Count
- When checked: The indicator counts the number of related records (e.g., number of opportunities).
- Calculation - Sum
- When checked: The indicator sums a specific numeric field across related records.
- Example, it is used to sum the Expected Revenue from opportunities.
- Related Field
- The specific field used in the counter or sum.
- Example: Expected Revenue (Opportunity).
- Campaign Type
- This section defines which campaign types this indicator applies to. The indicator will only be selectable in campaigns of the specified types.
When creating or editing a campaign, users can add indicators from the configured list. Each indicator includes the following fields:
- Indicator → A dropdown linked to the Indicators Configuration. Select which metric you want to track (e.g., number of new contacts, participants).
- Count Value → Defines the value of the field which can be measured for the indicator.
- Goal Value → A manual input where you set the target you want to achieve for this indicator.
- Current Value → Automatically computed from the campaign data, showing the real-time value of the selected field.
- Progress → Displays the percentage of Current Value vs. Goal Value.
- Use Progress → A checklist option. If checked, this indicator’s progress will be used as part of the main campaign progress and will also display in the campaign List View.
This structure makes it possible to monitor campaign performance in a precise and measurable way, while also highlighting key progress metrics directly on the campaign overview.


4. Specific Fields
The Specific Fields tab allows you to define custom measurable fields that can be tracked within the campaign. These fields provide flexibility to measure values that are not covered by the standard Indicators tab.
Each record in the Specific Fields tab includes:
- Field Name → The label of the field as it will appear in the campaign.
- Field Type → The type of field (e.g., Integer, Float, Selection).
- Model → Defines the type of record that the field will measure through campaign members.
In this module, fields are always added from the Member model (Campaign Members), but the record type can be:- Contact → Fields related to individual people.
- Company → Fields related to organizations.
- Options → Available only if the field type is Selection. Defines the possible values for the field.
- Is Count → If checked, the field value will be measured as a count of members.
- Is Sum → If checked, the field value will be measured as a sum of numeric values.
- Count Option → Available for Selection type fields. Lets you choose a specific option to count.
- Count Tags → Available for fields with tags. Lets you select which tag(s) should be counted.
- Goal Value → A manual input where you define the target value for this field.
- Current Value → Display only. Automatically computed from campaign member data based on Is Count or Is Sum.
- Progress → Display only. Shows the percentage of Current Value vs. Goal Value.
- Use Progress → Checklist option. If checked, this field’s progress will be used as part of the main campaign progress and will also display in the campaign List View.
This tab is especially useful when you want to track custom KPIs on campaign members (e.g., specific contact roles or company categories) that are unique to your team’s workflow and not part of the predefined indicators.


💡 This feature only applies in the Member menu. Specific Fields are created and tracked exclusively on campaign members.
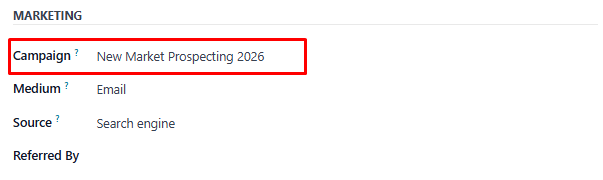
5. Additional Information
The Additional Information tab allows you to link custom informational fields to the campaign. These fields are grouped and predefined in the configuration, making it easier to capture and organize extra details related to your campaign.
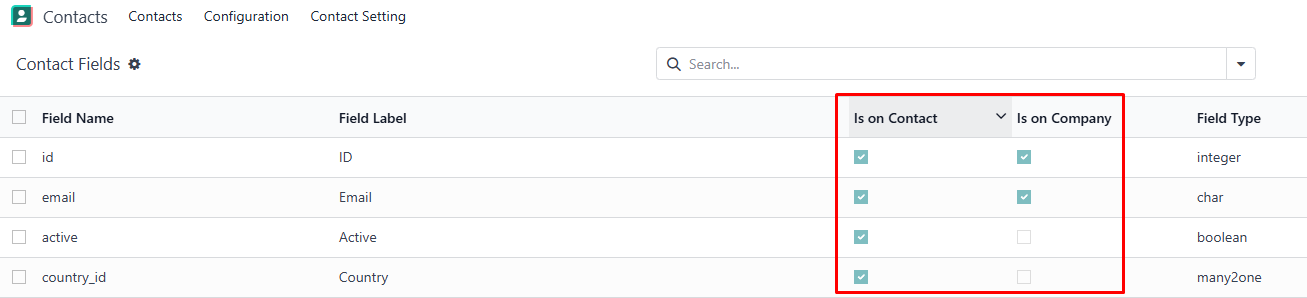
Before administrators can configure Additional Information in campaigns, they must first prepare the fields that will be available. This setup is done in Contacts → Contact Setting → Contact Fields.
When editing or creating a contact field, administrators can decide whether the field should be usable inside campaigns by enabling one or both options:
- Is on Contact → Makes the field available for individual contacts.
- Is on Company → Makes the field available for company records.
Only fields marked with these options will later appear as selectable choices in the Additional Information configuration. This ensures that campaign data stays consistent and only relevant fields are offered for campaign use.
In Configuration → Additional Information, administrators define which extra fields can be added to campaigns. The configuration includes:
- Name → The label of the additional field group (e.g., “Contacts,” “Companies”).
- Related Model → The model where the fields are stored (e.g., Contact, Company).
- Fields (Tab) → Select the fields (prepared earlier in Contact Fields) to include in this group.
- Campaign Types (Tab) → Defines which campaign types the additional field group applies to. The fields will only appear in campaigns of those types.
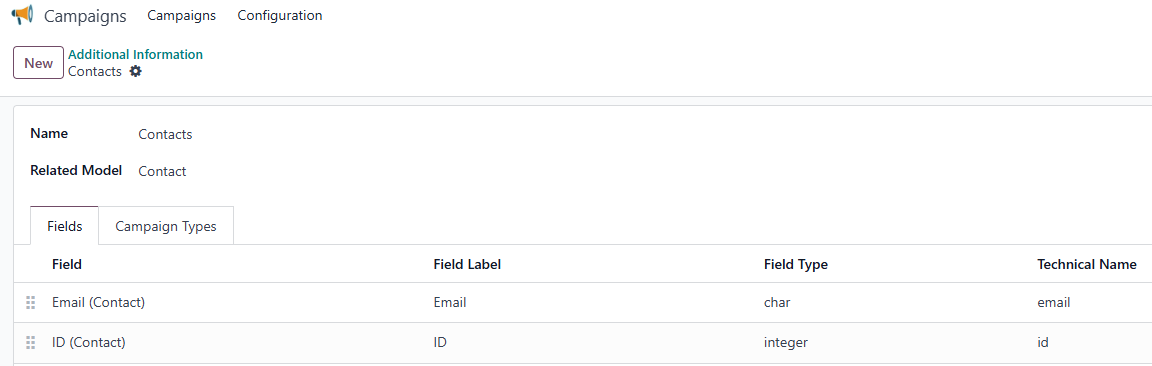
When creating or editing a campaign, users can add additional information from the configured list. Each record in the Additional Information tab includes:
- Additional Field Group → Select a group of fields, defined in Configuration → Additional Information.
- Field → The specific field to include, chosen from within the selected Field Group.
- Field Description → A human-readable explanation of the field’s purpose.
- Technical Name → The system identifier of the field, used for backend and reporting purposes.
- Model → The model to which the field belongs (e.g., Contact, Company, or Member).
- Field Type → The type of field (e.g., Char, Integer, Float, Selection, Date).
This tab is especially useful when your organization needs to capture extra campaign-related data that is not covered by standard fields or indicators, but still needs to be tracked in a structured way.

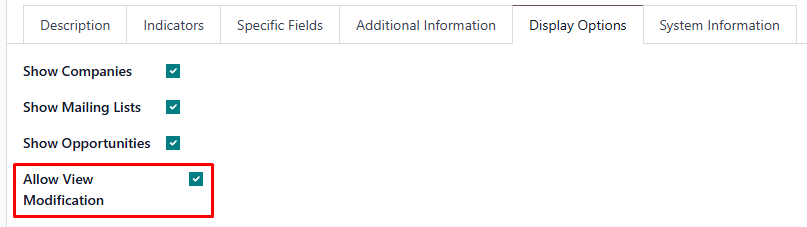
6. Display Options
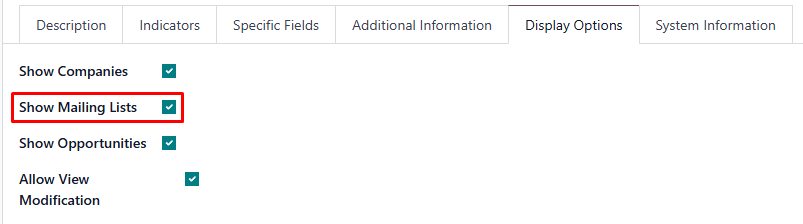
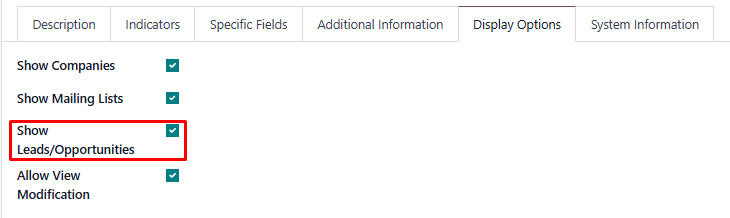
In the Campaign form, you will also find Display Options checklists. These allow you to customize what information is visible within the campaign:
- Show Companies → Displays company records linked to campaign members. Useful if you are prospecting organizations, not just individual contacts.
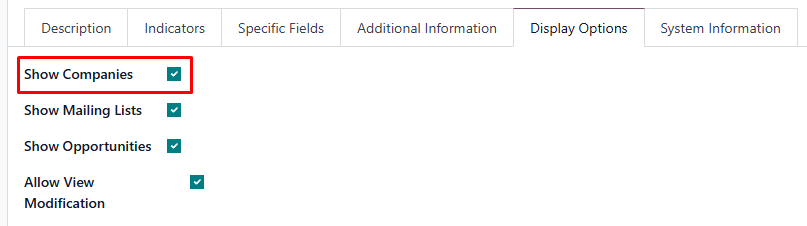
- Show Mailing Lists → Shows mailing list groups that are part of the campaign, which you can assign manually when creating mailing lists in the Email Marketing menu.

- Show Leads/Opportunities → Displays linked CRM leads/opportunities related to the campaign members. Helpful for tracking business potential directly from the campaign.

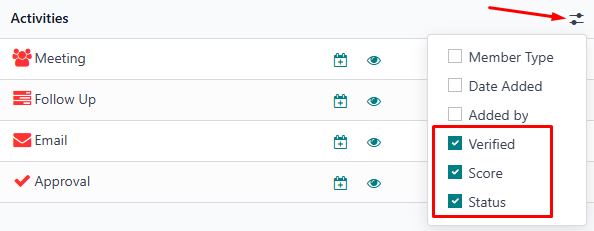
- Allow View Modification → Enables users to configure the campaign view by showing or hiding fields from the Specific Fields tab and Additional Information tab. This gives flexibility to adjust what is displayed while keeping the rest of the campaign structure fixed.
💡 The Campaign field to link leads/opportunities will only appear if you are a participant in in that campaign and also the owner of that leads/opportunities.
7. System Information
The System Information tab provides automatic metadata about the campaign record. These fields are read-only and maintained by Odoo to help with traceability.
The tab includes:
- Creation Date → The exact date and time when the campaign was created.
- Created By → The user who originally created the campaign.
- Last Updated → The most recent date and time the campaign record was modified.
- Updated By → The user who last made changes to the campaign.
This tab is primarily for audit and traceability purposes. Users cannot modify these values directly.

B. Clone Campaign
Instead of starting from scratch, you can duplicate an existing campaign using the Clone Campaign feature.
Steps:
- Go to the Campaigns list view.
- Select (checklist) the campaign you want to clone.
- Click Clone.

- A wizard will appear where you can set:
- End Date → Define the new end date for the cloned campaign.
- Options to Clone (check the items you want to carry over):
- Indicators
- Specific Fields
- Additional Information
- Participants
- Members
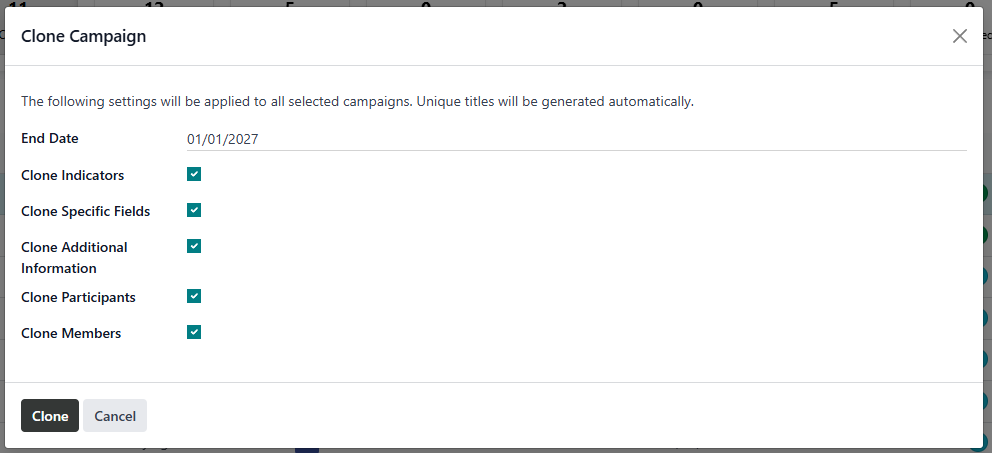
- Click Clone. The selected campaigns will now appear as new campaigns with the chosen details duplicated.
💡 Notes:
- The cloned campaign will inherit all selected configurations.
- You can adjust the cloned setup before launching the new campaign.
C. Add Participants
After creating the campaign, you can assign Participants. These are the users responsible for managing or contributing to the campaign.
Steps:
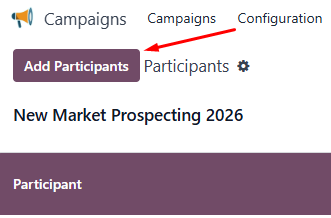
- Click the campaign row to go to Member view.
- In the smart button group near the middle-top, click Participants.

- Click Add Participants.
- Select one or more users to add as Participants.
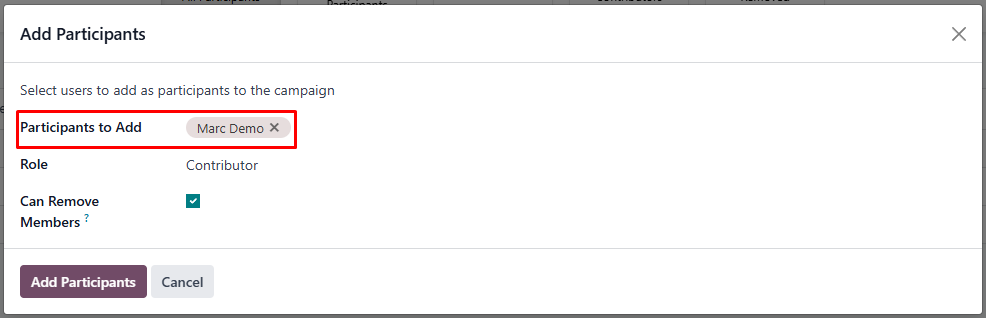
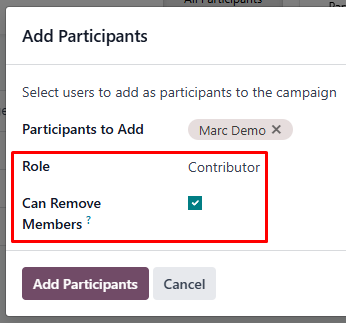
- Assign their role:
- Responsible (Manager) → Main user responsible for the campaign. The ability to remove members is automatic.
- Contributor → Supporting users. A checklist Can Remove Members will appear; check it if you want this participant to be able to remove members.
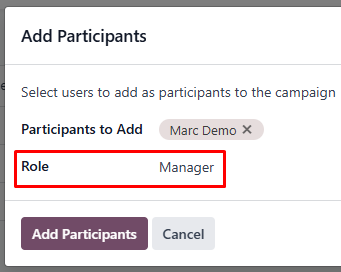
- Click Add Participants. The selected records will now appear as participants of the campaign.
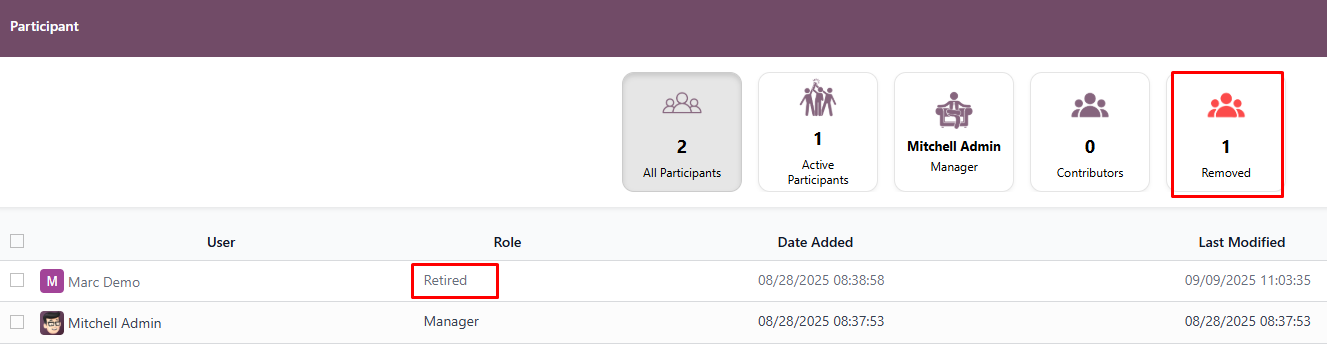
Retiring Participants:
- If a participant should no longer be part of the campaign, open the Participants list and change their role to Retired.
- Retired participants lose their permissions and visibility for that campaign.
💡 Notes:
- Users who are not assigned as Participants cannot perform any actions in the campaign (read-only access).
- If the Confidential checklist in the campaign is checked, only Participants and Administrators can view the campaign.
- Participants influence campaign reporting and permissions.
D. Add Members
After participants are defined, you can add members (Contacts or Companies) who will be linked to that campaign. Members represent the individuals or organizations that the campaign is targeting or interacting with.
To add a member:
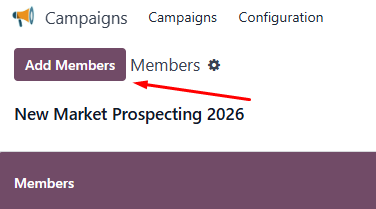
- From the campaign list, click the campaign row → this opens the Member view.

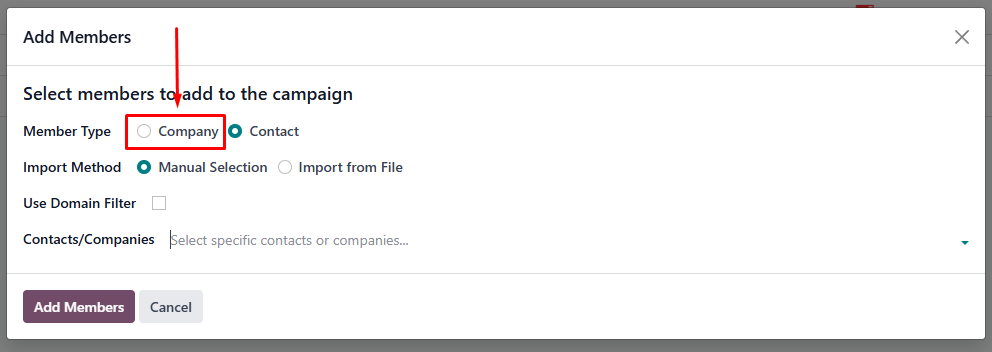
- In the Member view, click Add Members.
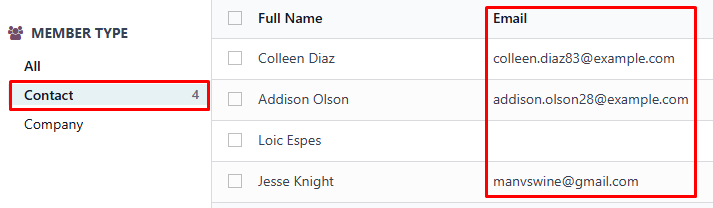
- Select the type of member you want to add:
- Contact → an individual person.
- Company → an organization.
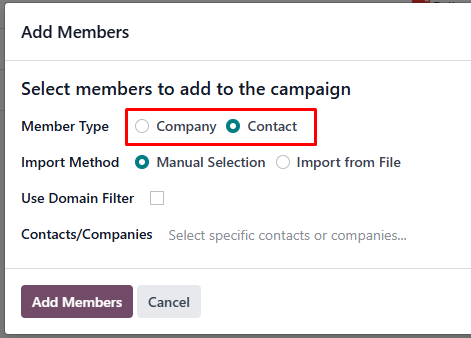
- Choose how to bring records in:
- Import from File → Upload a file (CSV/Excel) containing the records.
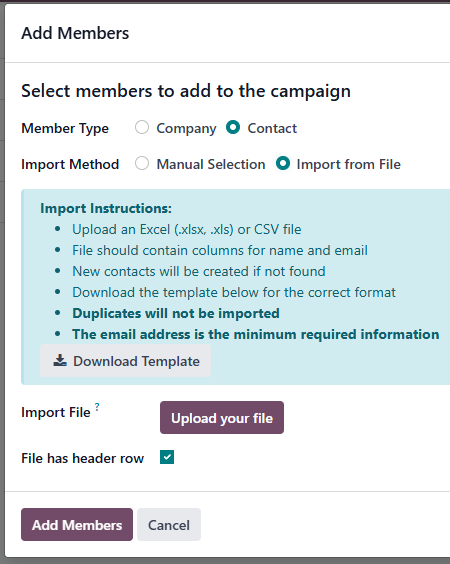
- Manual Selection → Pick records directly from the list.
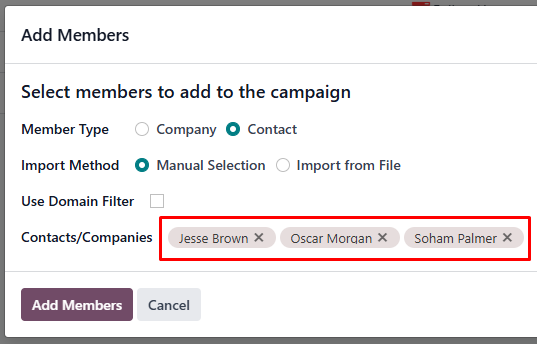
- If you select this option, you can enable the Use Domain Filter checklist to refine the available records (e.g., filter by region, stage, or tag).
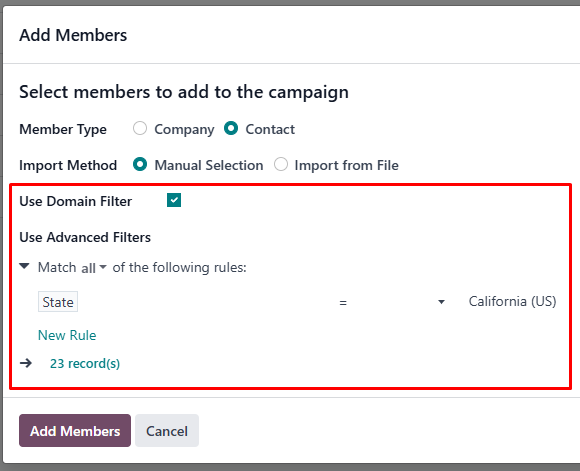
- If you select this option, you can enable the Use Domain Filter checklist to refine the available records (e.g., filter by region, stage, or tag).
- Import from File → Upload a file (CSV/Excel) containing the records.
- Click Add Members. The selected records will now appear as members of the campaign.
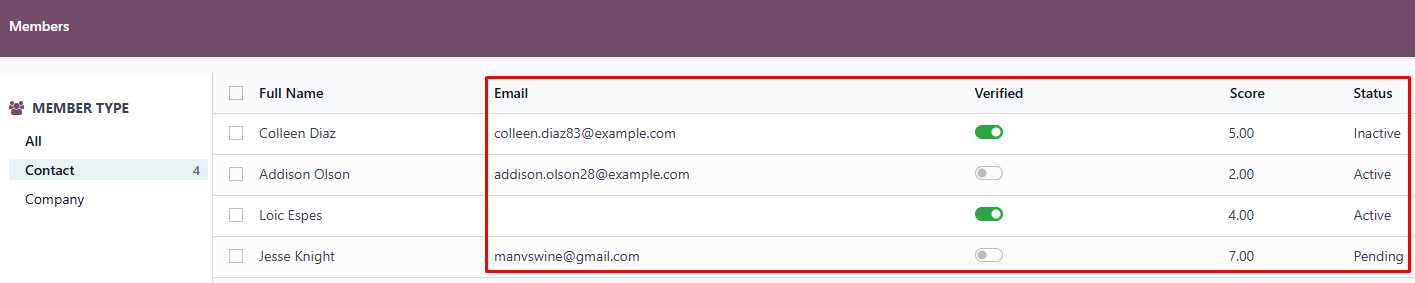
Once added, members will appear in the Members tab list view, where you can track their status and other linked information.
💡 Members are central to campaign tracking, since indicators and specific fields often rely on member-related data.
E. Add Activities to Members
After adding members to the campaign:
- Access Member Activities
- Click the campaign row to go to the Member View.
- You will see the list of members in the campaign.

- Add Activity for a Member
- Option 1: Click the Clock icon in the Activities column.
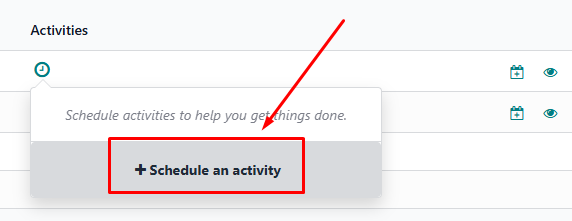
- Option 2: Click the Clock or Calendar icon inside the member’s row.
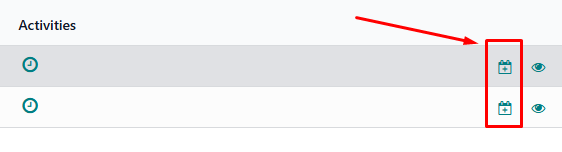
- Option 1: Click the Clock icon in the Activities column.
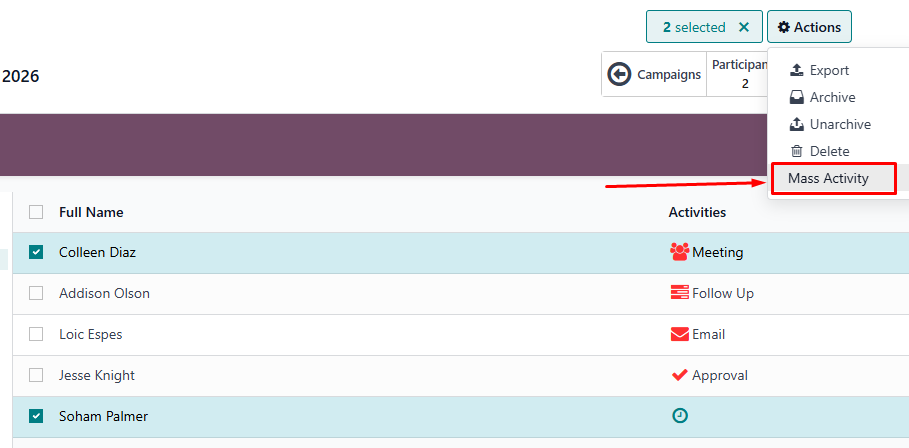
- Add Mass Activities for Multiple Members
- Select multiple members from the list.
- Click the Mass Activities button inside the Actions menu.
- Fill in the common activity details to assign the same activity to all selected members at once.
- Fill Activity Details
When adding an activity (single or mass) to campaign members, fill in the following fields: - Activity Type → Select the type of activity (Call, Meeting, Task, Email, etc.).
- Object → Select the activity’s related object from a list (like Point Technique, Prospection, or Formation Clients). This links the activity to a specific focus so you can track and report it more easily.
- Summary → A brief title or summary of the activity.
- Due Date → Set the date by which the activity should be completed.
- Assigned To → Select the user responsible for completing the activity.
- Description → Optional field for additional details or instructions about the activity.
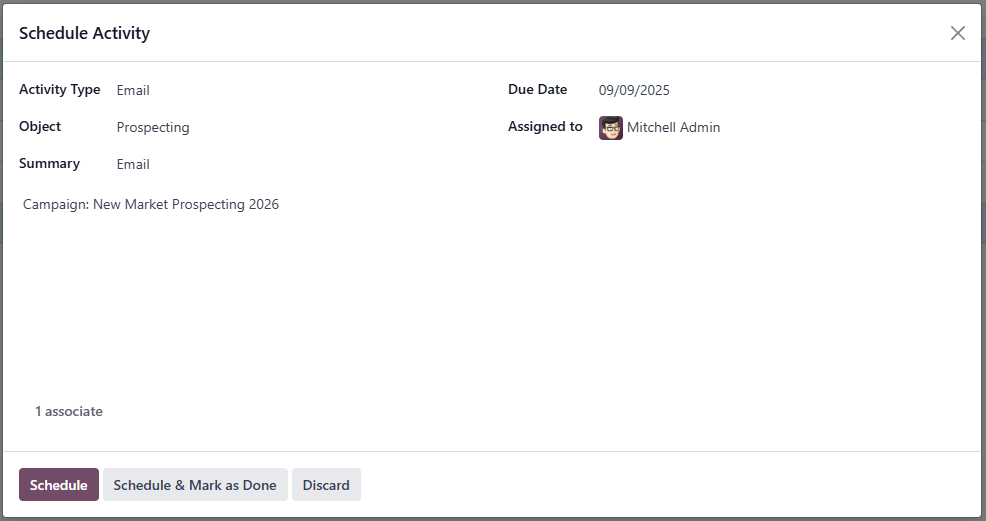
These fields ensure each activity is properly tracked and linked to both the campaign and the member.
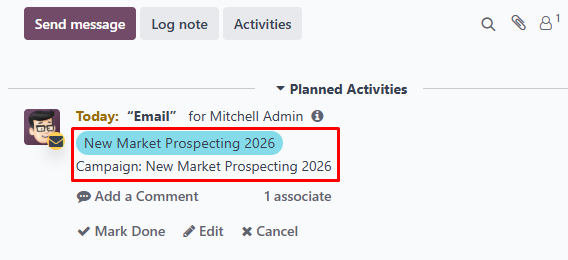
- Link Activity to Campaign
- The activity will automatically link to both the Member and the Campaign, helping track progress and reporting.
- The activity will automatically link to both the Member and the Campaign, helping track progress and reporting.
- Tracking & Reporting
- Activities contribute to campaign performance indicators.
- Responsible participants can monitor completed activities and follow up on pending tasks.
- You can view the history of activities for each member directly from the member list.
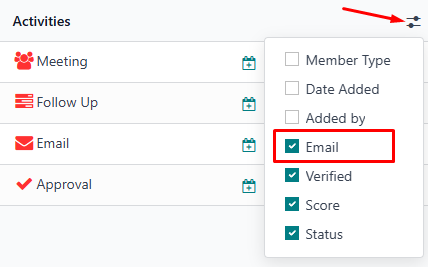
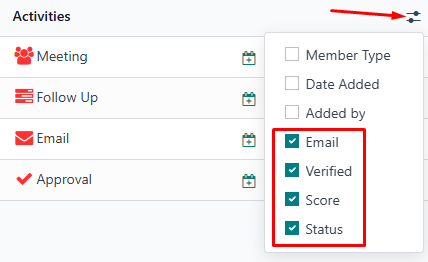
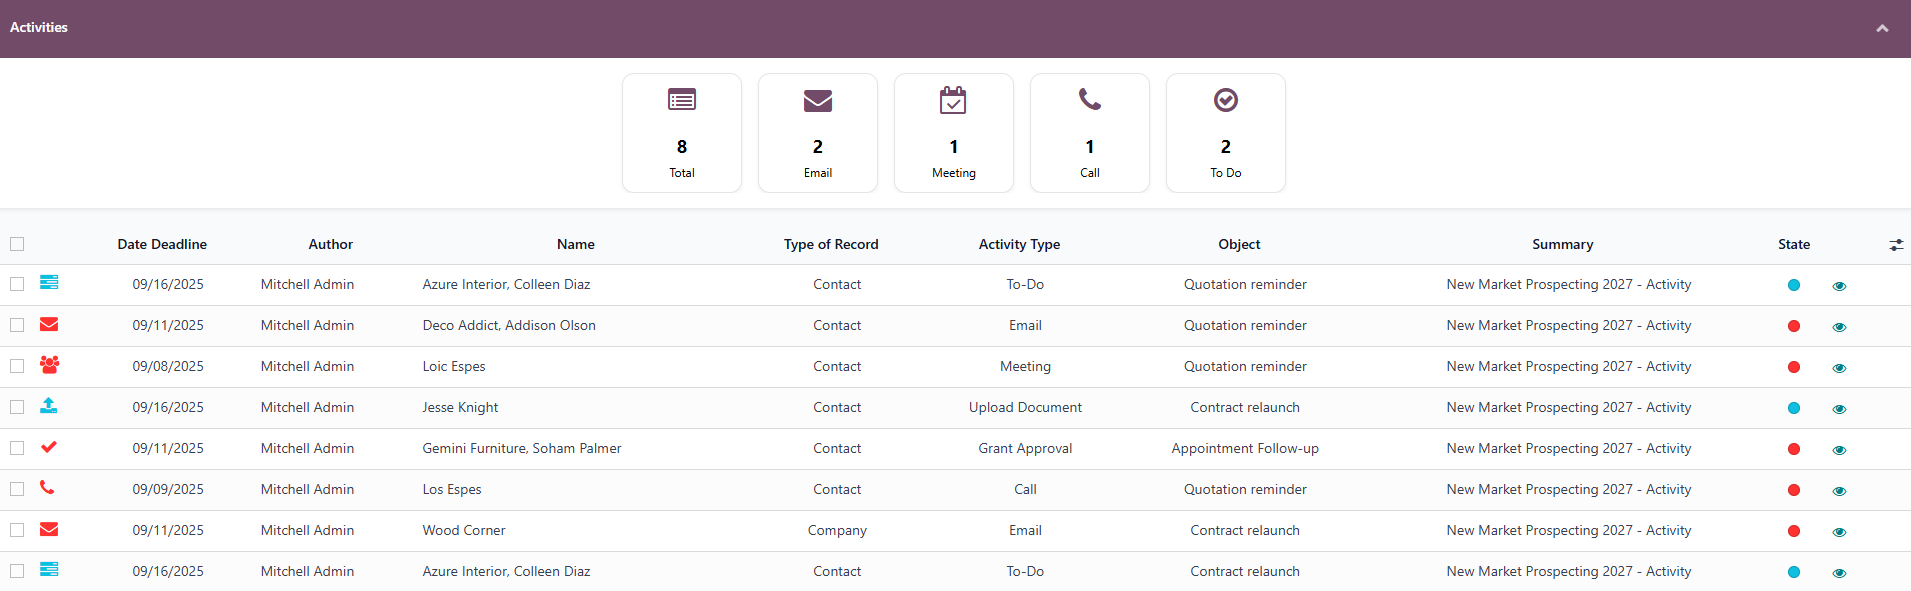
- Activity Overview
- You can see the list of activities for all members by clicking the Activities button inside the smart button group (together with Participants and Members).
- Each member’s activity history is also visible from the member list.

💡 Notes:
- Only Participants can add or manage activities if the campaign is marked Confidential.
- Non-participants will have read-only access and cannot modify activities.
F. Add Mailing Lists
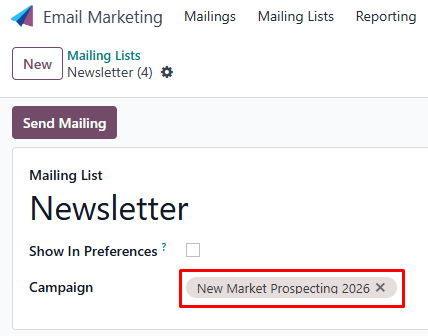
If the Show Mailing Lists option is enabled in Display Options, a Mailing Lists smart button will appear inside the campaign.
- Open Mailing Lists: Click the Mailing Lists smart button inside the campaign to view all mailing lists linked to that campaign.


- Mailing lists can be assigned manually when creating them from the Email Marketing menu.
- Linking mailing lists to a campaign allows you to centralize email outreach and monitor performance within the same campaign.
💡 Mailing lists are not created inside the campaign module but linked from Email Marketing.
G. Add Leads/Opportunities
If the Show Leads/Opportunities option is enabled in Display Options, a Leads/Opportunities smart button will appear inside the campaign.
- Open LeadsOpportunities: Click the Leads/Opportunities smart button inside the campaign to view all opportunities linked to that campaign.


- You can link leads/opportunities directly to the campaign.
- The campaign field in lead/opportunity will only appear if:
- You are a Participant in the campaign, and
- You are also the Owner of the lead/opportunity.
- This ensures only relevant and authorized users can connect their opportunities to the campaign.
💡 Linking leads/opportunities provides visibility of pipeline progress directly from the campaign dashboard.
Dashboard
The Dashboard provides a real-time overview of campaign performance and outcomes. It can be accessed directly by clicking the Dashboard smart button in the campaign view (next to Members, Participants, and Activities).

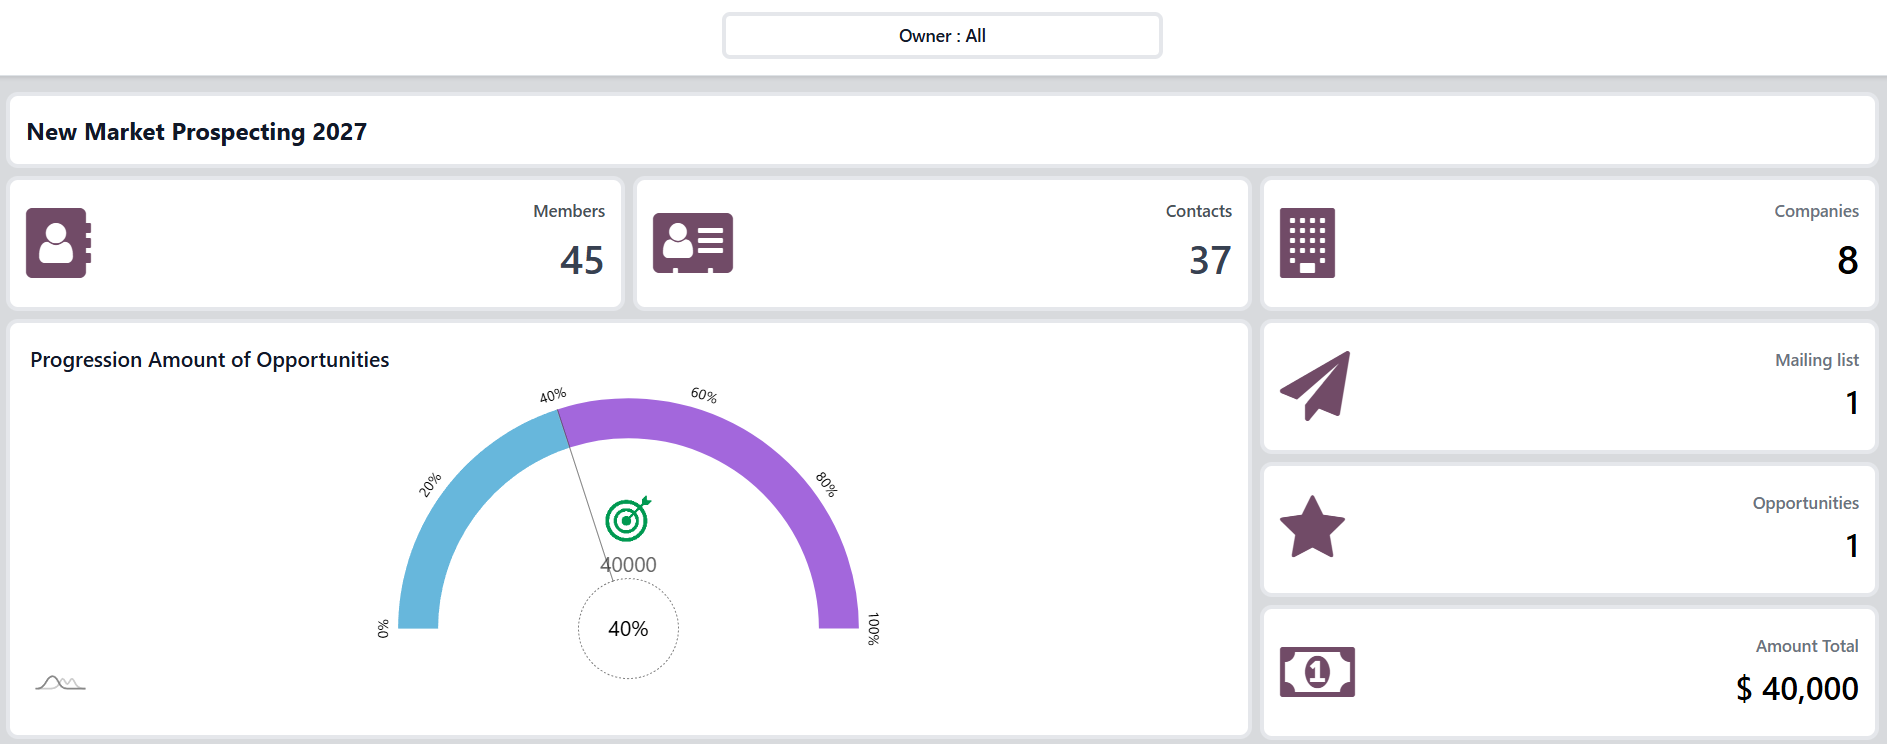
Key Elements on the Dashboard:
- Campaign Statistics
- Members count (all campaign members)
- Contacts and Companies count
- Mailing List count
- Leads/Opportunities count and Total Amount from those leads/opportunities
- Progress Tracking
- Progression → A dynamic progress bar that reflects the field selected in the campaign configuration (Indicators or Specific Fields) where “Use Progress” is checked.
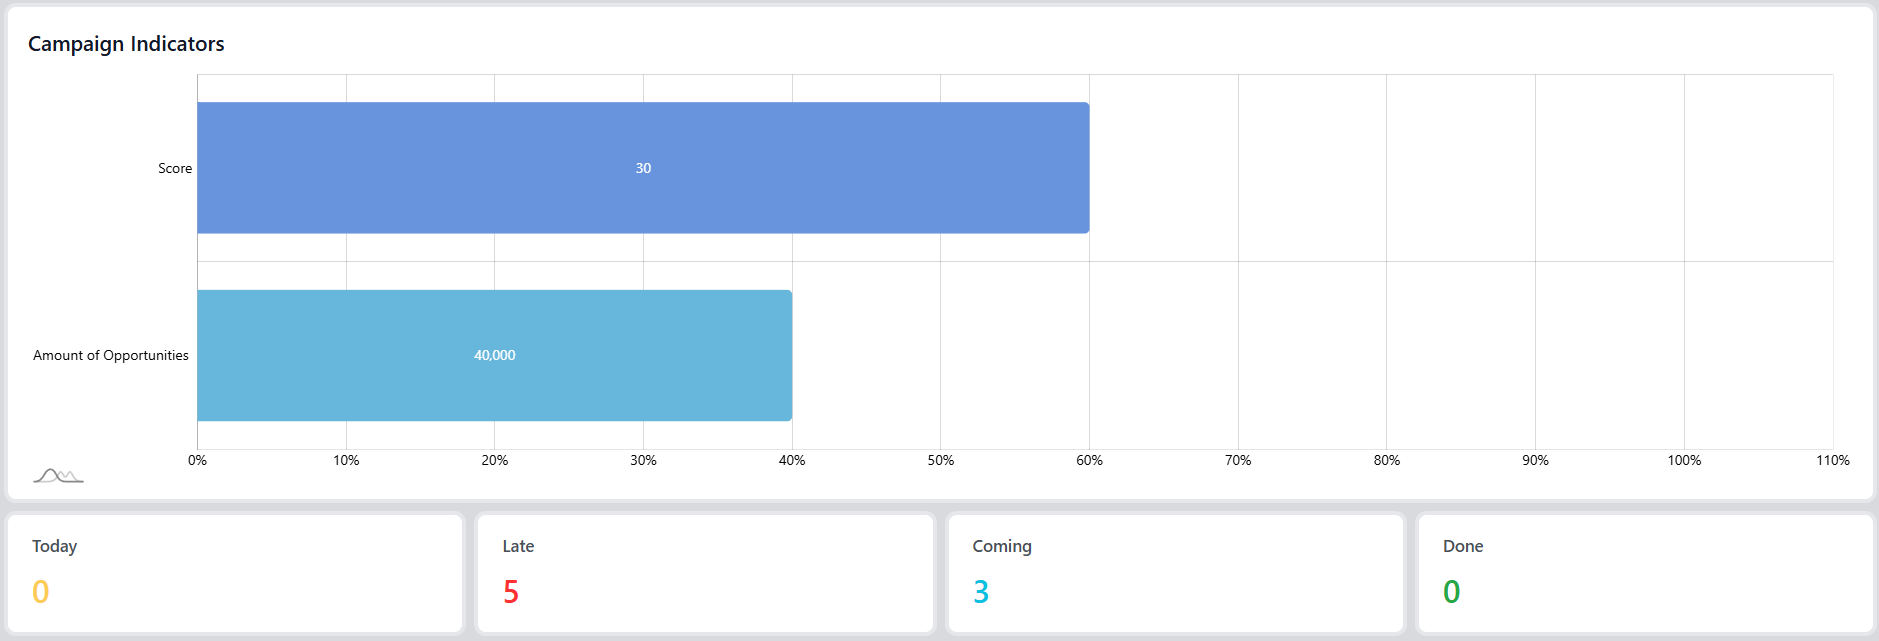
- Charts for Indicators Fields (defined in the Indicators tab)
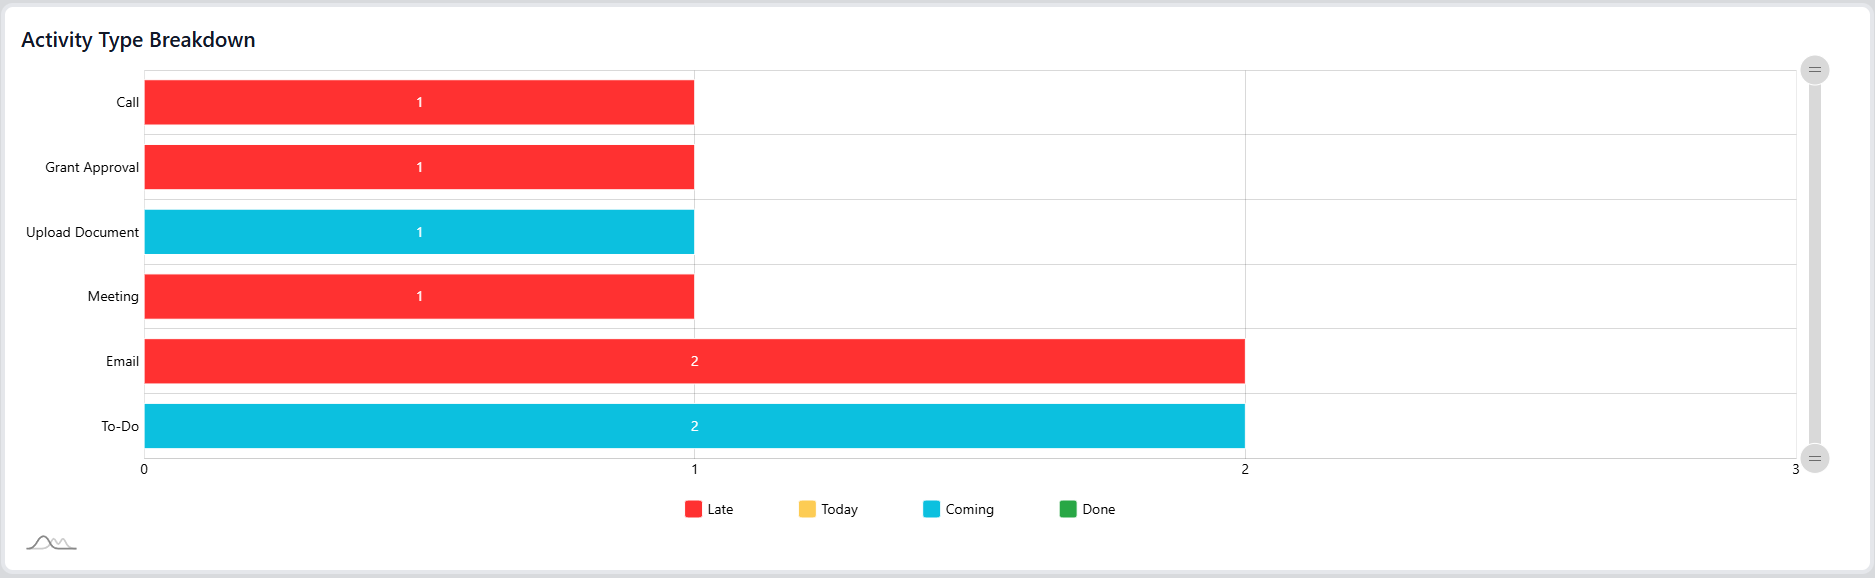
- Activity Monitoring
- Activities grouped by Today, Late, Coming, and Completed/Finished
- Activity Type Breakdown (e.g., Call, Email, To-Do, Meeting, etc.)
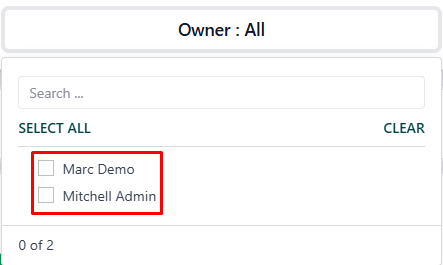
Filtering Options:
- Reports and charts can be filtered by All Participants or by specific participants to review individual contributions.
💡 Notes:
- All data is automatically updated based on campaign members, indicators, and logged activities.
- If a campaign is marked as Confidential, only Participants and Administrators will see its dashboard.
Tips and Best Practices
- Define Clear Objectives First → Before creating a campaign, decide what you want to measure (e.g., number of prospects, qualified leads, opportunities). This helps in setting Indicators or Specific Fields.
- Always Assign Participants → Campaigns work best when Managers and Responsibles are clearly defined. This ensures accountability and correct access rights.
- Use Progress Wisely → Only check “Use Progress” on fields that truly represent the campaign’s success metric (e.g., Qualified Leads, Closed Opportunities).
- Keep Campaigns Confidential (when needed) → Use the Confidential checkbox for sensitive campaigns so only Participants and Administrators can view and manage them.
- Leverage Activities → Always add follow-up activities (calls, emails, meetings) to members. This creates history logs and ensures systematic outreach.
- Utilize the Dashboard Regularly → Monitor Progression, Indicators, and Activities daily to track the health of the campaign.
Quick Workflow
Create Campaign → Add Participants → Add Members → Assign Activities → Monitor Progress
- Create Campaign
- Go to Campaign → Create.
- Fill in Basic Information (Title, Type, Manager, Dates, etc.).
- Save the campaign.
- Add Participants
- Click into the campaign.
- Use the Participants smart button.
- Assign Managers and Responsibles.
- Add Members
- From campaign Member view, click Add Members.
- Choose Manual Selection, Import from File, or Domain Filter.
- Assign Activities
- Add activities per member (via clock/calendar icons) or use Mass Activities from the Actions menu.
- Monitor Progress
- Check the Dashboard smart button.
- Review Progression, Indicators, and Activity breakdown.
- Create Campaign
Frequently Asked Questions
Q: What is the difference between Participants and Members?
A: Participants are users (internal staff) managing the campaign. Members are the records (Contacts or Companies) targeted by the campaign.
Q: Can I hide a campaign from other users?
A: Yes. Use the Confidential option in Basic Information. Only Participants and Administrators will see it.
Q: Can one campaign have multiple progress indicators?
A: Yes. You can set multiple Indicators or Specific Fields. Only the ones marked Use Progress will be displayed in the campaign list and dashboard.
Q: How are Activities tracked?
A: Activities are logged under each Member and visible in their history. A global list is available via the Activities smart button.
Q: What happens if I retire a Participant?
A: Retired participants lose active permissions for the campaign but remain visible in the history for traceability.
Q: How is the Progression bar calculated?
A: It is based on the Indicator or Specific Field where Use Progress is checked. Progression = Current Value ÷ Goal Value (%).